How To Defrost A Whirlpool Refrigerator (Detailed Guide)
Your refrigerator freezer is the home for all the frozen food, ice creams, and packed veggies, so you need to keep it clean and hygienic.
If you have an old Whirlpool refrigerator, you need to defrost it from time to time to avoid it from frosting up and to maintain the quality of food. While the new Whirlpool refrigerators have auto-defrost options, it’s still a good idea to defrost the refrigerator to clear out excess frost and keep your freezer in top-notch condition.
But, before you can defrost a Whirlpool refrigerator, you need to know how the entire system works. That’s why we’re here to discuss the defrosting method of your Whirlpool freezer by highlighting the different components and functions of the defrost system. We’ll also talk about how to maintain the performance quality of the defrost system.
So, without any more dilly-dallying, let’s get on with it!
Why Does Your Freezer Need Defrosting?
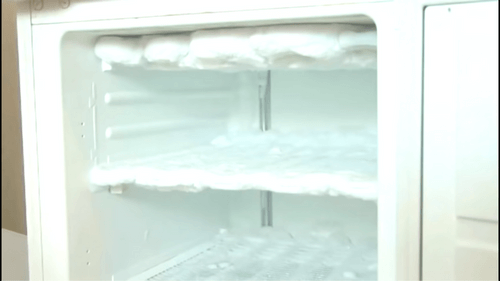
Every time you open the freezer door to get some food, it allows outside air to enter the freezer carrying all the heat and moisture inside. Once the moisture gets inside the appliance, it freezes and can build up ice over time. If the freezer doesn’t come with an auto-defrost option, the frost will turn into ice, covering the temperature sensors and interior air vents.
The gradual frost buildup can put too much pressure on your freezer and cause it to overwork. Defrosting the freezer from time to time will help to melt away the ice and keep your Whirlpool refrigerator from breaking down. Even if your freezer has an auto-defrost feature, it’s best to defrost it when you’re upgrading or moving the appliance.
Furthermore, if you have an old Whirlpool freezer that tends to build up ice quickly, you can defrost it more than once a year. You can also defrost the freezer when the ice buildup is thicker than ¼ inch. Always check the instruction manual of your Whirlpool refrigerator model before you start defrosting the freezer, you can also check out the error codes.
How To Defrost Your Whirlpool Refrigerator?
Step 1: Turn Off And Unload The Freezer
First and foremost, you need to turn off the Whirlpool refrigerator and unplug it from the power supply before you can start the defrosting process. If you have a small portable refrigerator, move it outside or to the garage to clean the freezer without creating a mess inside the house.
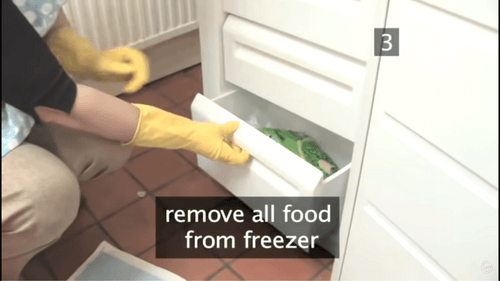
Next, you need to unload the freezer and move all the food safely. You can store the food inside a cooler to prevent it from thawing and going bad because it might take a while to complete the defrost cycle.
Step 2: Drain The Water
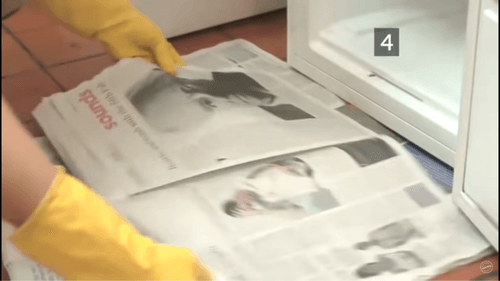
Once you turn off the freezer, the frost inside it will start melting and leaking water. You need to lay towels and plastic liners in front of the refrigerator door to keep the water from flowing everywhere and creating a mess. Also, stuff the refrigerator shelves with old rags or paper towels to absorb more moisture.
If your freezer comes with a drainage hose, place it in a bucket or a low basin to safely drain the water without unnecessary spillage. You can also place some shims under the front legs of your refrigerator to tilt it backward near the drainage hose to facilitate better water drainage.
Step 3: Let The Ice Melt
The most effective way to defrost your freezer is to let all the ice melt once you unplug the refrigerator. Leave the refrigerator door open and wait for some time until the ice melts away. You can use a hair dryer or place a fan in front of the freezer to speed up the process of defrosting.
Keep the freezer door open and place the fan correctly to facilitate air circulation in the freezer. The room temperature will help to melt the ice faster and more effectively.
Step 4: Mop Up And Clean The Freezer

As the ice starts to melt, use old towels or rags to mop up the water. It’s best to use beach towels because they are large enough to mop up more water. Once all the ice has melted, and the water is wiped away, you can work on cleaning the freezer.
Mix one tablespoon baking soda with four cups of warm water and use a clean rag to clean the shelves, inner walls, and freezer door. Then, use a damp cloth to wipe the inside of your freezer to dry up everything.
Step 5: Refill The Freezer And Turn It On
After defrosting, cleaning, and drying the freezer, plug it in the wall socket, turn the power back on, and wait for it to reach the optimal temperature. Depending on the food load and ambient temperature, it can take some hours, but the time usually varies between different Whirlpool models. Once the freezer is up and running again, you can take your food out of the cooler and place it inside the freezer.
What Can You Do If The Defrost System Isn’t Working?
If your Whirlpool refrigerator isn’t defrosting normally, you need to check the defrost thermostat and defrost heater. These two defrost system components work together to melt away excess frost buildup inside your freezer. If the thermostat is malfunctioning, it can’t signal the defrost heater to melt the ice around the evaporator coil, causing the ice to build up over time.
On the other hand, if the heater is not working, it can’t melt any ice buildup even if the thermostat is signaling correctly. Since their functions are interrelated, you need to determine their working condition when your freezer stops defrosting altogether.
Furthermore, you need to take care of your refrigerator’s defrost timer because if the timer breaks down, it can’t initiate the defrost cycle. The fridge might be stuck in the cooling mode, leading to unnecessary frost buildup that can be quite difficult to get rid of.
If you detect that any of these components are not working properly, hire a professional technician or contact the Whirlpool service center immediately. They can use their knowledge and expertise to assess and fix the problem to prevent further damage. Don’t try to fix the defrost system yourself because you might do more harm than good or even compromise the product warranty.
How Can You Adjust The Whirlpool Defrost Timer?
First, unplug the Whirlpool refrigerator from the power supply, wait for a few minutes for the power to dissipate, and then adjust the thermostat dial to turn it off. If your refrigerator has two thermostats on its back wall, remember to turn off both.
Now, replug the refrigerator to your wall outlet and wait for the timer to adjust itself automatically. You’ll know when the timer has adjusted itself because you can feel the freezer compartment of the refrigerator heating up gradually. The heating process will continue for around ten minutes, showing that the defrost timer is working properly.
Finally, turn the thermostat back on by adjusting the dial and set it according to your preferred ambient temperature. Once the entire setup is done, you can conveniently run the defrost cycle without a hitch whenever the freezer needs it.
How To Change The Old Defrost Heater?
Step 1: Turn Off And Empty The Fridge
If you are experienced with DIY refrigerator repair projects and well-acquainted with the defrost heater assembly, you can replace a broken defrost heater without hiring a professional technician. But, before you can start any repair work, you need to turn off the Whirlpool refrigerator and unplug it to avoid electrocution.
You can also shut off the circuit breaker powering the appliance for additional safety. Next, remove every edible as well as non-edible item from your freezer to easily access the back panel.
Step 2: Remove Back Panel
After you’ve emptied the freezer, you’ll need nut drivers and screwdrivers to remove the rail supports and get to the back panel. We recommend using a ¼ nut driver to unmount the screws holding the refrigerator’s back panel to the rear wall. Once you remove the back panel, you can locate the defrost heater running along the evaporator coils.
Step 3: Remove Your Old Heater
Use the same ¼ driver to loosen the screws securing the evaporator coils to the refrigerator’s rear wall. Then, slowly pull the heat shield towards you so that it goes under the coils and cannot move. In this way, you can pull the evaporator coils forward and easily disconnect the wires attached to the defrost heater.
Then, remove the two retainer clips holding the heater wires, followed by removing the grommets and wires from your freezer’s evaporator bracket. Finally, unhook the retaining wires to completely separate the old heater from the coils and get it out.
Step 4: Bring In The New Heater
Carefully place the new defrost heater at the bottom of the evaporator coils. Then, push it gently until the wire terminals are wrapped at its right side, passing through the bracket holes of the evaporator. Reconnect the wire connectors and place the clips in their designated positions.
After you’ve reattached the clips, carefully put back the evaporator in its previous location and remount the screws to secure it to your freezer’s back wall. Now, you need to carefully replace the back panel and make sure to put the screws in the right places. Finally, you can plug in your fridge and turn the power back on.
However, replacing your broken defrost heater can be a long and complex process because you need extensive knowledge regarding the defrost heater assembly and refrigerator wiring. So, if the task becomes too daunting, you can always hire a professional to get the job done without any hassle.
How To Replace A Broken Defrost Thermostat In Whirlpool Refrigerators?
The first step to changing an old defrost thermostat is to turn off and unplug your Whirlpool refrigerator so that you can safely locate the device. Next, take out the back panel of your freezer section to locate the thermostat. You’ll also need to take out the freezer shelves, shelf railings, and other protruding parts inside the freezer to clearly access the thermostat without any obstruction.
After you move the back panel, the evaporator will come into your view, and the thermostat should be attached to it with a metal clip. Remove the clip carefully and cut the red and black wires connecting your freezer’s defrost thermostat. Carefully remove the old thermostat and cut the wire ends by half an inch to prepare them for connecting to the new thermostat.
Now it’s time to install the new thermostat correctly and connect its black and red wires to the refrigerator wires you prepared earlier. Make sure to connect the red wires of the thermostat to the red ones of your fridge and the black ones to the black wires.
Once you’ve carefully connected all the wires, attach the thermostat to your refrigerator’s evaporator and put the metal clip back in its place. Then, put back the back panel and secure it with screws, followed by remounting the freezer shelves, shelf railings, and all other parts you removed before. After everything is back in its rightful place, plug in the refrigerator and turn it on.
How To Perform Forced Defrost In A Whirlpool Refrigerator?
If the normal defrost cycle of your Whirlpool refrigerator can’t melt away the excess frost buildup in the freezer, you need to switch to forced defrost. Depending on your refrigerator model and its instruction manual, you can force defrost by opening the fridge door and holding down the door switches.
Once you press down the door switch, the refrigerator’s display will turn blank. Now, press the temperature key thrice by maintaining an interval of about ten seconds and release your door switches.
The blank display screen will now show you the forced defrost option, allowing the refrigerator to force defrost. After you locate the ‘f’ and ‘d’ commands for forced defrost, press the freezer’s temperature key one more time to start the forced defrost cycle.
What To Do If The Defrost Drain Is Clogged?
A clogged defrost drain will disrupt the drainage of water once the ice in your freezer starts melting. Your defrost drain can get clogged due to the deposition of debris over time, blocking the normal water flow. So, you need to check it from time to time to avoid blockage and take immediate action to remove the clog.
The first step to unclogging the defrost drain is to turn off the refrigerator’s power supply and unplug the appliance to ensure safety. Next, you need to locate the drain hole, and you can usually find it somewhere around the bottom of the fridge.
Take a plumbing snake or a stiff wire and stick it down the drain hole to identify the blockage. You can also use an old coat hanger by straightening it and leaving its hook intact.
Now, push the snake or wire vigorously down the drain to free the blockage and get rid of the clog. Continue this process until you can’t feel any resistance while running the wire inside the defrost drain.
After you’ve loosened up the clog, it’s time to remove it completely to regain proper water drainage. Take a teaspoon of baking soda and mix it with two cups of hot water to form a bubbling mixture. Now, pour this cleaning solution down the drain and let it work on breaking down the persistent debris buildup.
Once the clog is removed, clean the area thoroughly and find the refrigerator pan that stores the drained water. Take the pan out, empty and wash it, and carefully place it back in its position to avoid water overflowing. Finally, you can replug the fridge and turn its power back on.
How Can You Turn Off The Defrost Mode In Whirlpool Refrigerators?
After the ice has melted away and you’ve cleaned and restocked the freezer, you need to switch off the defrost mode. In that way, the cold air in the freezer can safely store all your food and groceries, preventing them from going bad. Turning off the Whirlpool refrigerator defrost mode is pretty straightforward, and you can do it in a few easy steps.
Firstly, unplug your refrigerator and let it rest for a few minutes, allowing the power to dissipate. Next, turn off the defrost thermostat and plug your fridge back into the wall outlet. Then, turn on the thermostat and adjust it to the original setting, and the defrost process will stop automatically.
Can you lay a whirlpool refrigerator down
When moving a Whirlpool refrigerator, it’s important to handle it with care to avoid any damage. Laying it down on its side is not recommended. The refrigerator should be transported upright to avoid any potential damage to the compressor or other internal components.
If you must lay the refrigerator down, make sure to properly secure it and use a appliance dolly.
Also, it’s important to wait at least 24 hours after moving the refrigerator before plugging it back in to allow the oil inside to settle. This will help prevent any damage to the compressor and ensure that your refrigerator runs efficiently.
Related:
Final Thoughts
Defrosting your freezer from time to time will help you to prevent the appliance from overworking and breaking down. You also need to check the working condition of each component to ensure that the Whirlpool defrost system offers optimal performance.
However, if any components malfunction or stop working, you need to replace them to avoid long-term damage. You can follow the steps mentioned above to carry out the defrost method and replace broken defrost components. But, if you think it’s too much hassle, you can always hire a professional or contact the Whirlpool service center to get the job done.
On that note, we’ll sign off. Until next time!