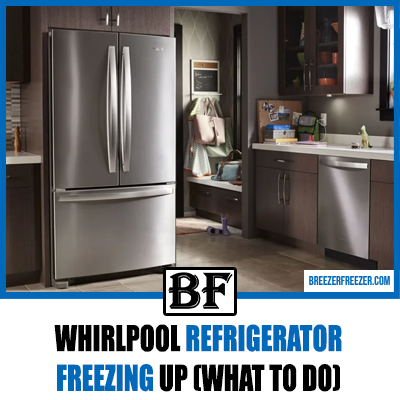
Whirlpool Freezer Not Freezing
Has your Whirlpool freezer stopped working after a few years of use?
That’s not uncommon as the components start wearing away after a point. But there’s nothing to panic about, as all the minor issues can be fixed in just a few steps.
So, if you want some pointers on the matter, we’ve got you covered with our informative guide.
Let’s get to the details!
Whirlpool Freezer Not Freezing
Your perfectly functional Whirlpool freezer can stop working due to a number of reasons, making it difficult for you to put the finger on what exactly happened.
That’s why we’ve got you covered with a list of components to check and get to the root of the problem. We also have a list of error codes like EO, which is to do with temperature. Read on!
Components To Check In Your Whirlpool Refrigerator
1. Condenser Coils
Dirty condenser coils could be a real ice breaker (literally) because they hinder heat dissipation from the freezer. Heat build-up in the unit will lead to increased temperature, reducing its overall freezing capacity.
Just so you know, condenser coils in a Whirlpool refrigerator are present at its base, so keep an eye on their condition every now and then.
2. Evaporator Coils
As opposed to condenser coils, evaporator coils are more directly related to the functioning of the freezer, as they are present in the back wall. That’s why they are prone to freezing up due to continued frost build-up or very low temperatures.
Also, when the coils are exposed to humid air, they ice up because of condensation. If this continues for a long time, the evaporator coils freeze frequently, and the defrost cycle fails to keep up. As a result, the freezer stops working efficiently and needs manual defrosting.
3. Condenser Fan Motor
The primary function of a condenser fan is to cool the condenser coils and the refrigerator compressor. However, if the motor malfunctions, the coils won’t cool down properly, leading to a dysfunctional freezer.
Now, a motor can act up due to several reasons like dust accumulation on the fan blades, no continuity, excessive heat, etc. So, try to turn the blades to check the motor functioning; you can also use a multimeter to check its continuity.
4. Evaporator Fan Motor
Check the number of evaporator fans in your Whirlpool refrigerator in the owner’s manual. If there’s only one, you will probably find it on the back panel of the freezer cabinet. This fan is mainly responsible for maintaining a good flow of cold air inside the unit, and if it stops working, the freezer will be slightly cool but won’t freeze ice optimally.
To check the motor functioning, turn the fan blades and see if they are stiff. And if it has become noisy, it is a sure sign that something is off. Also, take a look at the motor windings to ensure that there is good continuity.
5. Temperature Control Thermostat
A thermostat controls the compressor of a Whirlpool refrigerator and keeps the temperature low. The best way to find out if it’s faulty is by adjusting the temperature setting to the maximum level. If you hear a clicking sound, it’s a sign that the thermostat is working fine, but if you don’t, it’s time to check its continuity using a multimeter.
6. Thermistor
Much like the temperature control thermostat, a thermistor helps the compressor to run. Additionally, it affects the functioning of the evaporator fan, which is why it’s a crucial part of a Whirlpool freezer. It relays the temperature setting to the control panel and regulates the power supply to the compressor and the condenser fan.
To determine whether it is working properly or not, once again, take out the multimeter and test it. You’ll see the resistance changing as freezer temperature fluctuates, but if that doesn’t happen, then something is up with the thermistor.
7. Compressor Start Relay
In close association with the start winding, the relay powers on the compressor and runs the Whirlpool refrigerator. However, if it malfunctions for some reason, the compressor will either run after short intervals or stop altogether, taking down the freezer with it.
So, to troubleshoot the start relay, detach it from the system and inspect it between the start and run terminals. Also, look out for a burning smell, as a short-circuit could be a probable cause of breakage.
8. Start Capacitor
Same as the start relay, the start capacitor provides a power boost to kickstart the compressor. Therefore, if the compressor is unable to turn on, it might be because of a broken capacitor.
Ways To Fix Your Whirlpool Freezer
Now that you know all the possible reasons that might have stopped your Whirlpool freezer from freezing, we can move on to the solutions. So, here’s how you can try to fix it:
1. Condenser Coils
Dirty condenser coils can easily be avoided if you start cleaning them regularly. If they are present inside the freezer walls, you need not fret, as they’ll naturally be safe from dust.
However, in case your model has them behind or under the freezer, be sure to thoroughly clean them every six months by following these steps:
Step 1: Disconnect the refrigerator by removing the cord from the electric socket and pulling it away from the wall to access the condenser coils conveniently. If they are at the base, look for the removable toe guard in your model and detach it.
Step 2: Put on a narrow attachment on your vacuum and eliminate dust build-up or debris from the condenser coils. Do the same for the surrounding areas to keep them clean for a longer time. Furthermore, you can access the coil nooks by using a skinny attachment.
Step 3: Next, you’ll have to scrape off the debris using a long-handled brush for a deep clean. This step is extremely important because the initial vacuum isn’t enough to eliminate the deep-seated grime.
Step 4: Once the brushing is done, vacuum the condenser coils again to ensure getting out every speck of dust. Doing this will keep your Whirlpool freezer running smoothly without having to struggle too hard with temperature regulation.
Step 5: You can return the unit to its original position and plug the cord back in. Lastly, give it a few minutes before switching it on to see if the freezer has started functioning again.
2. Evaporator Coils
To fix frozen evaporator coils, you’ll have to regulate the optimal temperature in your freezer and prevent frequent frost build-up. For those of you who own a model with an automatic defrost system, get it tested to pinpoint the problem.
However, if you have one with manual defrosting, follow these steps to get your freezer working again:
Step 1: Empty the fridge and put all its contents in an icebox or a cooler. Take out all the trays and baskets as well to avoid them getting wet in the process.
Step 2: Place towels or cotton rags under the fridge, especially around the door, to soak the pooling water. Do this before you push the manual defrost button to avoid cleaning it later.
Step 3: Adjust the thermostat to the lowest temperature readings or simply press the defrost button. You can also unplug the fridge and open its door to speed up the process.
Step 4: Let the inner section of the freezer and the evaporator coils dry; you can also wipe them using a cotton cloth. Leave the unit in this condition until all the ice melts, which you can also thaw if you want it to defrost quickly.
Step 5: Once the frost is eliminated, re-plug the unit and tweak the thermostat reading to the desired temperature. The freezer will most likely start working again, so restock the fridge and don’t forget to treat yourself with an icy drink for all the hard work.
3. Condenser Fan
The condenser fan blades might be stiff because of wear and tear, so you can treat it by changing the bearings. But if there’s no continuity in the motor, then a replacement is surely on the cards.
4. Evaporator Fan Motor
Open the fridge and press the door switch to get the evaporator fan motor running again. That’s because it stops when the door is opened, but activating the switch will keep it running. If it still doesn’t start, that means you should get it replaced by a professional.
5. Temperature Control Thermostat
Once you are sure that the thermostat is faulty, you can replace it with a new one to fix the freezer. Follow these steps to pull off the task efficiently at minimal costs:
Step 1: Unplug the fridge from the power outlet and loosen the screws of the panel covering the temperature control thermostat.
Step 2: Take a pair of pliers (needle-nose) and pull out the wire connectors from the terminals of the assembly. After that, remove the clips or the mounting screws holding the thermostat and free it from the thin evaporator tube.
Step 3: Fit the new thermostat on the tube, reconnect the wires, replace the panel cover, and replug the refrigerator. Finally, turn it back on after a few minutes and check if the freezer has started functioning again.
6. Thermistor
Moving on, the thermistor is a pretty complicated part, and if you feel it has broken down, it’s better to call the Whirlpool service center and get it fixed. It will cost you some money, but it’ll be better than taking the matter into your hands and causing further damage.
7. Compressor Start Relay
A faulty compressor start relay can be replaced in the following way:
Step 1: Unplug the fridge and move it away from the wall to access its rear wall. Now, remove the rear compartment cover and look for the start relay assembly.
Step 2: Next, remove the wire retainer using the needle-nose pliers and pull out the old start relay. Then unplug the wire harness connected to it and transfer the run capacitor to the new start relay.
Step 3: Plug it in along with the wire harness to the fridge and reinstall the wire retainer. The job’s done, and you can put the rear cover back and plug the unit. Power it on and see if the compressor is running.
8. Start Capacitor
You can replace the start capacitor in the same manner as the start relay. The only difference is that instead of changing the relay, you’ll have to put a new start capacitor in place of the old one.
Final Words
A whirlpool fridge is one of the best options on the market, especially because of its efficiency and durability. And even if the freezer starts giving you trouble at some point, you’ll be able to fix it in a matter of minutes.
However, if you can’t find the problem, do call the service center to get some help. The professionals will surely take the burden off your back.
That said, it’s a wrap for the day. Until next time, take care and goodbye!