LG Refrigerator Compressor Problems & Solutions
If your LG refrigerator is not cooling properly, its linear compressor might be the root of the problem.

A linear compressor is the “heart” of a refrigerator. It drives the components like condenser fans, coils, and evaporator fans to move the refrigerant around the cooling system and keep the fridge running normally.
Any problems with the compressor can be detrimental to the operation of the refrigerator. So, to keep the compressor in a normal working condition and make sure the problem doesn’t exacerbate, it’s crucial to identify and resolve any problems at the earliest.
In this LG refrigerator troubleshooting guide, we’ve highlighted all the problems that might arise in a compressor and ways to deal with them. So, without further ado, let’s jump right in!
How To Tell If A LG Compressor Isn’t Working Properly?
Here are a few signs to warn you that your LG linear compressor fridge isn’t in good shape or not working properly:
A. Listen To The Sounds
A perfectly-running compressor toggles between on and off and makes a humming noise while running. Keep listening to the sound for at least 30 minutes; if you don’t hear the familiar pattern, you might have a faulty compressor.
Also, if it cycles on and off very often, that might also be a sign of malfunction.
B. Check The Temperature
Keep your hand on the compressor for a few seconds. If it feels hotter than usual, the compressor might have some issues. Although a compressor gets hot while running, overheating isn’t a good sign.
Do remember not to touch the compressor with your bare hands, as you might get burned.
C. Check For Irregular Operation
Before understanding the issues with a compressor, let’s understand how it works.
Pressure is applied to the refrigerant as it passes through the compressor and turns to liquid when it reaches the condenser. It then moves through a metering device before entering an evaporator to cool and return to its original gaseous state. The refrigerant further flows into the compressor, and the cycle continues.
As a result, a compressor only operates when refrigerant enters it. In case the compressor has some problems, it runs continuously without stopping or doesn’t run at all. So, if your refrigerator compressor is showing similar irregularities, it might be time for a checkup.
If you’re well-versed in the nitty-gritty of using multimeters, you can check the compressor for faults easily. Otherwise, it’s best to call in expert technicians who can identify and resolve the issue fast.
Problems With A LG Compressor And Its Solutions
A. LG Refrigerator Not Cooling
There can be many reasons for a fridge or freezer compartment not cooling, some of which are mentioned as follows:
1. Dirty Condenser Coils
If the condenser coils of your refrigerator are dirty, it will stop cooling. The deposited dirt doesn’t allow heat to dissipate from the refrigerant, which travels into the fridge and affects its cooling ability.
How To Fix
To start, unplug the refrigerator from any power source, disconnect the water supply, and move it away from the walls. Get to the back to unscrew the rear access panel at the bottom, where you’ll find the condenser coils.
Then, use a small and soft brush to remove dirt off the coils. But if the dirt has solidified, use a brush and warm water to get rid of it. Just make sure to dry the condenser unit properly before powering the refrigerator.
2. Condenser Fan
Another reason your condenser may not be cooling is that the blades of your condenser fan are stiff. It might be due to the deposition of dirt, or something might have become entangled in them.
How To Fix
In case the dirt has jammed up the fan to the point of no return, it’s time to replace it with a new one. On the other hand, if any objects have become entangled, remove them so that the fan runs freely.
If the fan blades rotate freely, it’s time to survey the condenser fan motor. Again, check for continuity of the fan motor using a multimeter; you need to replace it if it doesn’t show proper continuity.
3. Evaporator Fan
An evaporator fan distributes cold air from the freezer within the entire refrigerator. If objects become entangled or dirt accumulates in the evaporator fan, your refrigerator is unlikely to cool properly.
How To Fix
Take a soft brush to clean off any dirt from the evaporator fan blade, and in case it has jammed up pretty bad, you should also use hot water along with the soft brush. And if the issue still persists, you should check if the evaporator fan motor is working or not.
Apart from that, it’s essential to connect the multimeter with the evaporator fan and fan motor to check for their continuity. If the multimeter indicates there’s some fault with the components, replace both.
4. Temperature Control Thermostat
A thermostat in a refrigerator regulates the voltage of the entire cooling system, viz., condenser fan, ice maker, compressor, and evaporator fan. So, a thermostat malfunction means none of the refrigerator components receives the appropriate voltage to run, and the refrigerator can’t perform its cooling operation.
How To Fix
If you frequently adjust the thermostat settings to alter the inside temperature, then its overall resistance or continuity changes. So, using a multimeter, check the continuity of the temperature controlling thermostat and replace it if it indicates some fault with the component.
5. Start Relay
A start relay is a small black box attached to the compressor that turns on and off during the cooling cycle to maintain the overall temperature of a refrigerator. In case of a faulty start relay, it wouldn’t start the compressor, and the fridge won’t cool properly.
How To Fix
To check if the start relay is faulty, detach it from the compressor and shake it vigorously. If you hear a rattling noise, then there’s a chance it might be faulty. Alternatively, check its continuity using a multimeter, and if the results are not satisfactory, then it’s time to change it.
6. Thermistor
The thermistor in a refrigerator measures the inside temperature and sends the data to the control board, which checks it to regulate the overall voltage. For example, if it’s chilly inside the refrigerator, the control board will reduce the voltage supply to keep the temperature stable.
So, if there’s a faulty thermistor, proper temperature readings aren’t sent to the control board, and consequently, all the cooling components won’t function appropriately.
How To Fix
The only solution here would be to check its continuity using a multimeter. As we saw in the previous cases, no continuity indicates that the component needs to be replaced.
B. Compressor Making Noise
During normal operation, an LG refrigerator makes a humming sound. However, if the sound is too loud or strange, something is wrong with the compressor.
Clogged dirt or small objects are usually the culprits behind these unusual sounds. As previously stated, LG compressors work only when refrigerants pass through them; however, due to clogging, they are forced to run continuously, resulting in such sounds.
How To Fix
Clean the compressor thoroughly once or twice a year to keep it from jamming. Remove the compressor located on the rear side of the refrigerator, and clean it with a stiff brush. If it doesn’t work, use hot soapy water to clean it. But make sure to completely dry it out before running again.
If the sound persists even after cleaning, the compressor might have some other issues. Start with checking the continuity of the compressor using a multimeter. If the readings are not on par with a normally operating compressor, it is at fault and requires servicing.
Now, compressors can be tricky to work with, and we’d recommend calling a professional technician with the proper license and adequate experience. One thing to consider is that issues involving a compressor can be expensive, so if your refrigerator has aged enough, consider replacement instead.
C. Compressor Getting Very Hot
Here are a few things you can do if your compressor is hotter than usual:
1. Thermostat Temperature
As discussed above, a thermostat is responsible for regulating the cooling system of a refrigerator. So, depending on how cool the fridge is, the thermostat switches the compressor on and off. And in the case of a faulty thermostat, the compressor keeps running and gets overheated.
How To Fix
We would recommend replacing the thermostat straightway if it is not working properly.
A word of caution: Make sure to keep the temperature settings of a thermostat to what the manufacturer recommends. Or else, the compressor runs non-stop and imminently breaks down.
2. Refrigerant
Refrigerants are fluids that flow inside a refrigerator to deliver the cooling effect. So, if there is a shortage of refrigerants in the cooling system, it will not function properly, causing your refrigerator to become hot. In such a situation, the compressor works hard to keep the refrigerator working normally. And overworking might lead to its breakdown.
How To Fix
To fix this problem, it’s best to hire a professional technician who has sufficient experience in working with compressors. This is because the shortage of refrigerant might be an indication of a much bigger problem, such as leakage.
3. Condenser Fan
Condenser fans can also be a culprit behind heating your compressor. These fans dissipate cool air to the compressor, so when they fail, the compressor might get overheated.
How To Fix
Twirl the fan to see if it’s freely rotating and if stiff, check if there’s any dirt that has jammed the blades. If not, it’s time to change it. On the other hand, if there’s free movement in the fans, use a multimeter to check for any deviation in continuity readings. Like all other components, a faulty compressor shows skewed readings as compared to normal levels.
If the fan is faulty, you’ll need to replace it. Replacing an old fan with a new one can be tricky, but with the right tools and DIY skills, it’s doable. But if you’re not well-versed with proper technique, it’s wise to call a technician to look over it.
4. Condenser Coils
Condenser coils are made of copper and maintain sufficient pressure to keep the refrigerant in liquid form and release the heat it contains to keep the refrigerator cool. If too much dust gets jammed into the coil, it can’t keep the refrigerant in the liquid form. The compressor might have to work harder to maintain a low temperature and eventually overheats the refrigerator.
How To Fix
Check the condenser cooling coils and clean them using a soft brush in case they are dirty. Use a vacuum cleaner or a specially designed refrigerator cleaning brush for the purpose. And in case the cooling coils need to be changed, it’d be viable to call upon a technician.
D. Compressor Doesn’t Start
Some of the primary reasons behind your compressor not running are as follows:
1. Faulty Overload Relay/Switch
The overload switch maintains the temperature of a compressor and prevents any overheating. So, a compressor won’t run if this component is faulty.
How To Fix
An electrical surge or any potential voltage fluctuations might lead to the malfunctioning of an overload switch. So check for any overheating or arcing of the overload relay. If that’s the case, there’s a probability that it’s damaged, and it’s time to replace the switch with a new one.
2. Start Relay
If the compressor of your LG refrigerator isn’t working correctly, then an apparent reason might be a faulty start relay. It is an integral component of a compressor that triggers it to work. So, if the start relay doesn’t work properly, it’s time to change it.
If you need to check for a faulty start relay, one way would be to use a multimeter to determine if it’s functional or not. Or you can unscrew the compressor from the refrigerator and shake it. If there’s a rattling sound, there’s a possible issue in the start relay.
3. Motherboard
If neither the overload relay nor the start relay is at fault, then the motherboard might be the culprit. A motherboard has a small relay that sends voltage to the compressor for normal operation. In case the relay is faulty or burnt, the compressor won’t receive any voltage and won’t work.
How To Fix
Use a multimeter to check if the voltage output of the motherboard is on par with the actual value and if it reads anything more or less, change the motherboard.
How To Change A Compressor?
Step 1: Remove The Old Compressor
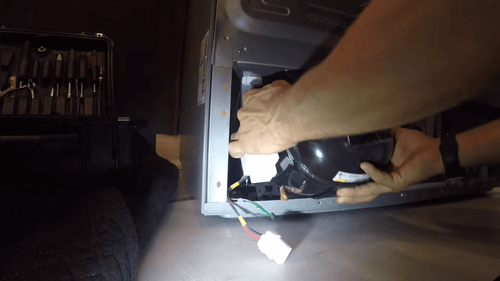
To begin, unplug the refrigerator from the power source and use a tester to ensure no current is flowing through it. Then, remove all the contents of your fridge. As replacing a compressor might take a long time, it will be viable to store your food in a cool place.
Move the refrigerator away from the wall to access its rear side, where the compressor is usually located. Now, remove the back panel by unthreading the screws, and once removed, put it away.
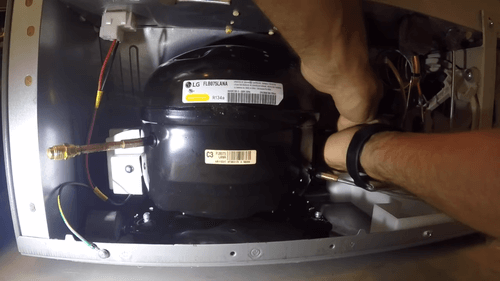
There you’ll find the compressor encased in a protective cover. To gain access to the compressor, remove the cover first and then its components one by one, that is, the relay, overload protector, and capacitor.
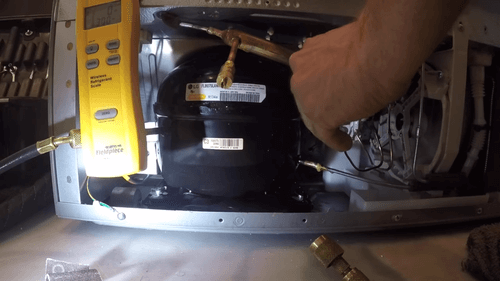
Then, attach a perforating valve to extract the refrigerant, which eventually makes its way into the process tube. Ensure that there’s adequate ventilation in the room so you won’t suffocate even if the refrigerant oozes out of the tube. Once the entire refrigerant is released, connect it with a nitrogen cylinder and inject the gas at a 50 PSI pressure.
Remove the valve, and cut the suction and discharge tubes to easily remove the compressor. Use a soldering torch to remove the filter.
In case the condenser motor has burned out, you will need to clean the tubes attached to it. The process might be a bit complex, and you need to weld the tubes to a suction line and solvent cylinder from both ends. Inject the solvent into the cylinder, and charge it using the remaining nitrogen to clear out any residual solvent.
Step 2: Install The Compressor
Start with attaching the new filter. Bring a proper-sized filter from the hardware store, as even a small gap can allow the refrigerant to escape. Then, weld the filter to the condenser outlet on one end and the capillary tube on the other.
Place the new compressor in the correct position and connect all the tubes properly. After that, check for leaks by injecting nitrogen into the compressor and using a sniffer tool. Remove the nitrogen once testing is completed. Alternatively, you can also apply soapy water to the joints and check for any bubbles.
Then, use a vacuum to extract air from the compressor. Connect the cooling system wires to the overload protector and relay terminals and reconnect the cooling components, such as the overload protector, relay, and capacitor, to the compressor.
Now, it’s safe to put the cover back on by properly threading the screws back. Fill the compressor with refrigerant at the correct volume, and double-check the position of tubes and wires before getting the fridge back and running.
Step 3: Test If The Compressor Works Properly
The last step will be to check if the new compressor is operating normally, which can be done by plugging the refrigerator back. If it’s still the same, call an experienced technician to look at it.
P.S: Replacing an old compressor with a new one is tricky and requires specialized tools like sniffer, welder, and others. If you don’t have such tools or aren’t confident of your DIY abilities, call upon a licensed and experienced technician.
How To Reset The LG Compressor?
In many cases, just resetting the compressor works rather than replacing it with a new one. So here’s how you can do it.
Step 1: Unplug The Refrigerator
Disconnect your LG fridge from the power source by removing the power cord from the wall outlet. Keep it unplugged for a few minutes; otherwise, the reset won’t work.
Step 2: Turn Off The Fridge From Control Panel
Next, using the control panel located inside the fridge, turn the freezer and fridge off. You will find the freezer temperature controls starting from 0 to 10, so turn it to the 0 setting.
Once done, you can replug the fridge to the wall socket.
Step 3: Reset Your Fridge
The next step involves resetting the LG freezer and fridge controls. Set the overall temperature of the fridge around 37 degrees Fahrenheit. Keep the refrigerator door open during the process.
Step 4: Wait Until The Temperature Stabilizes
Don’t rush things, and give your refrigerator some time to stabilize. Generally, it takes around 18 to 36 hours for a fridge to stabilize at a particular temperature. So, wait for that long.
Looking for a new LG? Check out our LG Side-by-Side Refrigerator Review, LG Instaview Door Review and our Best LG Fridge Under $3000 review
Final Words
That’s all for today!
It’s critical to perform a periodical maintenance check of your LG refrigerator. Declutter the fridge often to increase the airflow and reduce strain on the cooling system. And make sure there’s adequate airflow around and behind your fridge to allow for better cooling and keep the fans clean and operating freely.
We hope the guide helps you identify the compressor problems and deal with them properly. If you’re still unsure what’s causing the problem with the compressor, contact the LG service center or schedule an appointment over a call or through the official website.
Alternatively, you can get in touch with experienced refrigerator technicians who know how to tackle compressor problems. The experts from these services can take care of your refrigerator compressor problems faster and better than would be possible with the DIY route.
With that, it’s a wrap. Till then, goodbye and take care!