How To Reset Sub Zero Refrigerator (Quick Guide)

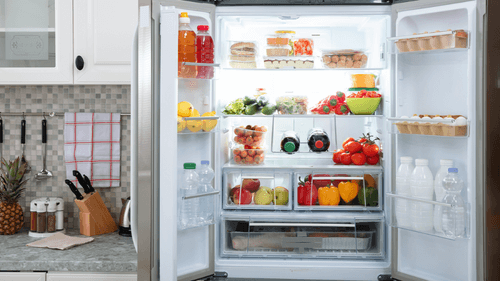
When it comes to luxury fridges, Sub Zero is a brand that has emerged as a favorite.
From stylish finishes to top-of-the-class configurations, you will find everything to make your kitchen all the more functional. However, you may need to reset the unit from time to time to keep it optimally functional.
And today, we will tell you all about it, so do continue reading!
How To Reset A Sub Zero Refrigerator?
Unlike many refrigerators on the market, Sub Zero refrigerators don’t come with a dedicated reset button. The easiest way to reset the unit is to turn off its circuit breaker for 30 seconds and then turn it back on.
If the model has a control dial, then set it to the lowest setting (0) before switching off the power. You can also switch off the main power supply and pull out the plug directly instead of switching off the circuit breaker.
We’d recommend following these steps if your fridge is new to bring it out of the showroom mode.
Talking about decreased cooling efficiency, the most common reason behind it is an accidental change in the internal temperature, which increases the internal heat. Hence, turning the Sub Zero thermostat to “reset” the temperature setting will fix the issue.
However, a main reset or temperature change may not always help the Sub Zero fridge run efficiently, and you may have to reset specific parts of the unit. We will tell you all about the different resetting procedures for the different components of the refrigerator in the following sections.
1. Door Ajar Alarm
The door ajar alarm on your unit may go off even if the door has been closed properly, and resetting it will be the only way to switch it off. For this, press the switch-on button (which is placed on the refrigerator’s control panel) once to shut down the unit for 30 seconds. Press it again to turn on the unit. As a safety precaution, ensure that the door has been properly closed.
2. Service Light
The service light will turn on to indicate a dirty condenser, so cleaning it is the best way to reset it. Start by switching off the main power supply and allowing the condenser some time to cool down. Most Sub Zero refrigerators have the condenser behind the grill, so pull it out (like you’d do for a cabinet door) to access the component.
Next, grab a vacuum, attach a soft bristle brush, and set it to the lowest power setting. Gently move the brush vertically along the direction of the condenser coils to avoid bending them.
Once the condenser is clean, close the grill, turn on the power supply, and press the power button to reset it. When the power comes back, it should automatically stop the light from blinking.
However, the light may continue to blink in some cases, which usually indicates a problem in the temperature sensor. And resolving it will require the services of a trained technician.
3. Vacuum Condenser
As the name suggests, the icon for the vacuum condenser will light up when it’s time to vacuum the condenser. Check if the condenser is clogged with debris or sludge, and clean it to reset it.
Another reason the icon may be blinking is due to high internal temperatures, so we suggest disconnecting the unit from its power supply for 10 to 15 minutes. This will resolve the problem and stop the blinking when the power is restored.
That said, other problems like a worn-out door seal or technical faults with the crucial components of the appliance may also cause the icon to blink. For instance, the compressor, condenser, or evaporator motor may start malfunctioning under pressure. In such cases, it’s better to avail the help of a trained professional to fix the issues.
As for an old or worn-out door seal, you can replace it the DIY way by following the instructions in the manual. A pro tip here: if you see that the doors of the fridge or freezer compartment have suddenly become difficult to shut, consider changing the seal.
4. Water Filter
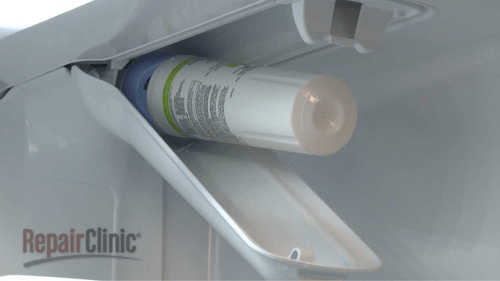
The water filter indicator will start blinking when it’s time to replace the filter, and you will need to reset it once a new filter is installed. Water filters on Sub Zero refrigerators will usually be located in front of the condenser cover.
You will also find a white-colored button on the left of the filter, which needs to be pressed for 5 seconds post replacement. This will reset the component.
5. Ice Maker

The ice maker may stop making ice, or you may observe a decrease in ice production if the water line has frozen due to extremely low temperatures. Or it may even get clogged due to sediments in the water filter. So, you may either have to increase the temperature in the freezer or change the water filter.
After conducting the required fix, remove the ice tray to get to the bottom of the ice maker housing, where you will find a red button that resets the ice maker. If your fridge was manufactured in 2009 or earlier, press the button for about 10 seconds to ensure that the reset process is successful.
On the other hand, for models manufactured in 2010 or later, you should hear a chime on pressing the button once to indicate a successful resetting. Put back the ice tray, and the ice production should resume to normal.
What Can You Do To Help Your Sub Zero Refrigerator Run Smoothly?
As you may have already figured out by now, the different icons will run the error code (or lit up) when there’s an issue with the appliance. And the best way to prevent this in the first place is to keep the compartments operating properly.
In this regard, the most basic thing you can do is keep the fridge clean by following these step-by-step instructions.
1. Switch Off The Power Supply
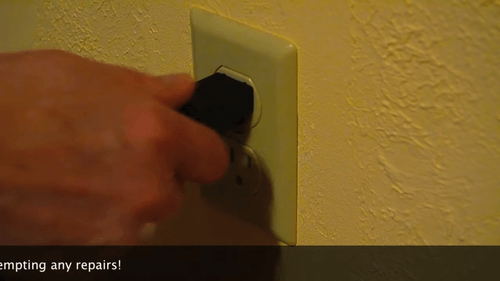
Start by switching off the power supply and allowing the appliance some time to cool down. Then, transfer all perishable food items to a different fridge and clean the racks with a cleaning solution, focusing on the air panels and door seals.
2. Clean The Condenser And Evaporator Coils
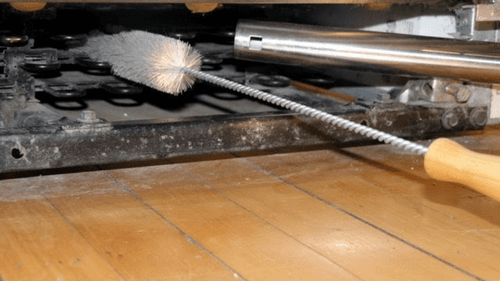
Use a vacuum with a soft bristle attachment or a clean cloth to remove any dust or debris from the condenser and evaporator coils. These are usually located at the rear bottom of the unit.
You may also need to defrost the freezer by switching off the power supply for a couple of hours. In that case, spread some towels on the floor to absorb the water.
3. Reorganize The Fridge
As the last step, reorganize the fridge to prevent the air panels from getting obstructed; otherwise, the cooling may get affected. At the same time, ensure that the settings of the thermostat in both compartments (fridge and freezer) is in accordance with the items stored inside them.
Related Faqs
How To Determine If The Different Parts Of The Fridge Are Working Properly?
If you notice that the fridge isn’t working properly despite performing all the above-mentioned resets, call a professional to get it checked thoroughly. This will help you get the right repairs and replacements done without causing further damage to the appliance.
What Is The Right Temperature For Your Sub Zero Fridge?
What temperature should a sub zero refrigerator be set at? In ideal conditions, the fridge compartment should be set at 38-degree Fahrenheit. Although the right temperature will depend on how much the fridge is stuffed, it shouldn’t be more than 45-degree Fahrenheit in any case. Likewise, the freezer should be set at 0-degree Fahrenheit.
Furthermore, it may be helpful to know that the internal humidity may cause the temperatures to fluctuate by +5 or -5 degrees Fahrenheit.
How Long Can Sub Zero Refrigerators Work Without Any Major Fault?
The average lifespan of a Sub Zero refrigerator is around two decades, during which it may require minor repairs or replacements. For example, the water filter may need to be replaced depending on the quality of the water supply in your home. Similarly, the evaporator or condenser coils may need to be replaced in case they burn out.
Final Words
On that note, it’s time to bring down the curtain on today’s guide.
But before we say goodbye, here are a few pro tips: schedule regular maintenance of the Sub Zero fridge by professionals, which will help detect and fix any problem from the get-go. And always go for authentic replacement parts to avoid compatibility issues.
Lastly, don’t forget to switch off the power supply before inspecting any part or cleaning the unit. We will see you next time!

![Are GE Refrigerators Good Quality Brand? [Quick Answer!]](https://breezerfreezer.com/wp-content/uploads/2023/10/Are-GE-Refrigerators-Good-Quality-Brand.png)