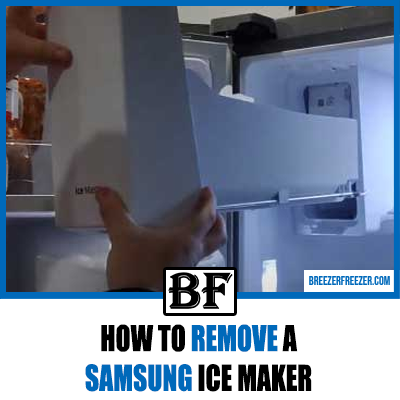
How To Remove A Samsung Ice Maker
After a long and tedious week of meetings and deadlines, you’re finally ready to celebrate Saturday night as it’s meant to be.
You have invited friends over and set the fridge on the freeze cycle to have enough ice for the party. But something’s wrong; the Samsung refrigerator is producing too much ice, and the ice maker appears stuck.
This has got you worried because no ice would spoil the mood of the party, especially with all the beverages everyone’s offered to bring.
Luckily, we have experience helping people on how to remove an icemaker from samsung refrigerator and how to replace it, but for that, you’ll have to read the rest of this guide.
Removing Samsung Refrigerator Ice Maker
If you own a Samsung fridge ice maker, it’s essential to know how to remove the ice bucket for easy maintenance. Otherwise, the ice will accumulate over time, hampering the normal functioning of the unit.
So, before it’s too late and to keep your food from going bad, you’ll have to clean the unit by dismantling the ice bucket. You’ll find an opening under the ice buckets, and wiggling the buckets gently should help loosen them.
But be careful not to rush and forcefully remove them as it could damage the unit. That’s why to prevent damage, some Samsung refrigerator ice makers come with a button, also called leveler, to release the ice buckets.
If you can’t shake them loose, we recommend checking the user manual as every Samsung refrigerator model has a different technique for removing the ice buckets. You should also note that you’ll have to remove them quickly when the ice starts forming in the buckets.
Failing to do so will lead to an overload of ice inside the unit, and the only option would be to use the forced defrost mode. While it’s not a major issue, it will leave your Samsung refrigerator ice maker inactive for a couple of days which could be a problem.
Naturally, removing the ice buckets and the wire dangling from them is the best way to care for the Samsung ice maker. But when there’s no wire, the ice may have spilled into the bucket. Take your time to locate the wire in such a scenario, and contact the support center for help.
Samsung Ice Maker Firmware Update

In some cases, excessive ice build-up inside the refrigerator and ice maker compartment will prevent Samsung refrigerators from connecting to other Smart devices. This means that the refrigerator is frozen over, and the only option is to use the ice maker reset button or the firmware update option to resolve the problem.
On that note, remember that keeping the unit connected at all times usually prevents freezing.
How Does A Samsung Ice Maker Work?
Think about it – would you like to be served desserts before the appetizer? No, right!
So, before we tell you how to remove a Samsung ice maker, you should know how it works. A Samsung ice maker uses electromechanical solenoids to control water flow, and the movement of the solenoids depends on the flow of electric current.
The current activates the valve in 7 seconds, allowing just enough water to pass through and fill the molds in the ice duct tray. After this, all that remains is to wait for the Samsung refrigerator to freeze the water into ice cubes.
If it’s taking longer than usual, you can check the refrigerator thermostat and alter the temperature. But once the thermostat temperature touches 9 degrees Fahrenheit, it closes an electrical switch to activate the heating coil beneath the ice maker.
As a result, the heat detaches the ice from the bottom of the molds, and an electrical circuit activates the ice tray motor. You should note that each cube in the mold is linked to the next and as the motor blades push through notches on the front, the ice cubes dislodge and land on an underside container.
Before the cycle is complete and it pushes the ice cubes out of the Samsung refrigerator ice maker, the cam lifts the shut-off arm. This ensures that the ice maker doesn’t produce ice non-stop; instead, it makes more cubes only when needed.
Steps To Remove Samsung Ice Maker
In this section, we have narrowed down all the steps to help remove an ice maker that won’t come out.
1. Is The Samsung Ice Maker Frozen?
The first step is determining if the ice maker is frozen because you’ll have to dethaw it if it is. And the easiest way to do this is by enabling the forced defrost mode of the defrost Samsung ice maker.
This involves pressing a combination of buttons that vary based on the Samsung refrigerator model, but usually, you would need to press the fridge and energy saver button together. Hold down the buttons for at least 8 seconds, following which you’ll need to press the fridge button 3 times until the letters “Fd” appear on the screen.
As is evident, Fd refers to forced defrost, and you’ll have to let the ice maker rest in this mode for 10 minutes. Then, switch back to the normal mode using the same buttons and press the fridge button until the screen goes blank and the beeping subsides.
2. Disconnect The Ice Maker
Once the ice has melted, the next step for removing the Samsung refrigerator ice maker is disconnecting it from the power source. This is pretty easy, but some people who fail to reach the power outlet opt to trip the circuit breaker, stopping the electric supply.
The bottom line is that you should make sure the fridge has shut down before moving on to the next step.
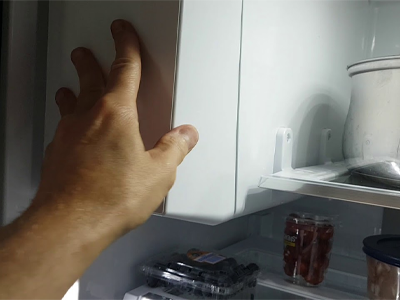
3. Remove The Ice Bucket
Moving on, grab the bottom of the ice buckets, lift them slightly, and remove them from the refrigerator. Sometimes, you may find an extra ice maker compartment after pulling out the buckets, so thaw them by leaving the fridge doors open.
We should tell you that this process will take time, and you mustn’t rush. Some people also use a hairdryer or heat gun, but this could prove risky, especially if the electrical appliance comes in contact with water. Not to mention, the heat might damage the plastic beyond repair, rendering the Samsung ice maker useless.
4. Remove The Housing
For the next step, you’ll need a flat blade screwdriver to take off the cover of the housing that’s encasing the wires. The cover is held in place by a Philips screw, so after removing it tilt the cover upwards slightly in your direction to take it off.
Then, disconnect the wiring from the sides of the ice compartment and gently pull to depress the clips that hold them in place. Doing so will ensure that the wire plug comes off easily.
5. Removing The Cooling Coil
Using the flat blade screwdriver, remove the Philips screw and the ice maker tray by prying the tray gently to the right before pulling it down. In some cases, you’ll also find cooling coils at the bottom of the Samsung refrigerator ice maker, which you should remove.
Use the flat blade screwdriver and pry the coil from above, enabling you to slide the ice maker out without any hassle. The coil will stay in place while providing sufficient room to remove the Samsung ice maker but be careful not to puncture the coils.
Also, ensure that the ice on the coils has melted before removing the ice maker, as damaging the coils will harm the unit beyond repair.
6. Removing The Samsung Ice Maker
The last step is removing the ice maker from the top of the coil by sliding it out gently. You’ll have to press the top of the coils, comprising a locking clip while pulling it forward and then down to release the mechanism.
As a result, the ice maker separates from the housing, and there you have it! We have successfully narrated how to remove a Samsung ice maker in 6 easy steps.
Remove Ice From The Samsung Ice Maker
Simply knowing how to remove a Samsung ice maker isn’t enough, and you have to be prepared for different scenarios. For instance, a Samsung ice maker produces a lot of ice, and we must discuss how to remove ice from the ice maker.
We suggest manually defrosting the ice by disconnecting the Samsung refrigerator from the power source. Then, leaving the refrigerator door open will allow the outside air to melt the ice faster.
Once enough of the ice melts, you should be able to remove the ice bucket and the ice cube tray without much difficulty.
Another option is to put the Samsung refrigerator in the forced defrost mode by pressing the right fridge buttons simultaneously. These are the lighting and freezer buttons that you must hold down for at least 12 seconds in most cases.
You’ll find that the display goes blank, after which you’ll have to press the lighting button 4 times to activate the forced defrost mode. Note that the Samsung refrigerator will keep beeping as it continues to defrost for 15 to 20 minutes, removing most of the excess ice.
But if you’re unable to access the forced defrost mode by pressing these buttons, try holding down the fridge and energy saver buttons for 12 seconds. In case it still doesn’t work, go over the instruction manual as Samsung refrigerator models often have different buttons to activate the forced defrost mode.
Removing A Stuck Ice Maker
The first step for removing a stuck ice maker is to check whether the Samsung refrigerator is frozen, meaning you can’t shift its position. You can follow the techniques mentioned previously and thaw the ice manually or activate the forced defrost mode.
This should remove most of the ice without you having to use a heating appliance to speed up the process. Rather than taking risks, we recommend waiting for a few minutes for the ice to melt, guaranteeing safety from electric shocks and reducing the chances of damaging the refrigerator components.
That said, if the Samsung refrigerator isn’t frozen in its place but appears stuck nonetheless, contact customer care without any delay. They will help solve the problem or employ the necessary personnel to resolve the issue.
You should also remember that there must be a valid reason for removing the Samsung ice maker because removing it frequently may damage the unit beyond repair. And even if you proceed to remove the Samsung ice maker, don’t try to make the repairs yourself.
The inner workings of a refrigerator are complicated, and unless you’re a seasoned DIYer or have experience repairing refrigerators, it would be best to get professional help.
It’s also essential to be safe, especially when working with electrical appliances, so you should wear a good pair of gloves. That way you’ll be safe from sharp objects as the gloves double up as an additional protective layer. And never begin the repairs or take off any parts without first turning off the Samsung refrigerator.
Remove Ice Maker Cover
Sometimes, you might have to remove the Samsung ice maker cover, which is very easy as opening the refrigerator doors provides access to the ice maker. You need to grab the ice maker from both sides gently but firmly, lifting the cover by applying the slightest pressure.
Remember that you must never apply excessive pressure or pull too hard if the cover doesn’t budge; instead, wait for the ice to melt before trying again.
Samsung Ice Maker Reset Method
Not to brag, but we also know how to reset any Samsung ice maker model – type 1, 2, or 3. You can note the steps below based on the model you have.
A. Type 1 Models
These units may have multiple ice makers, so step 1 would be to locate them. They are usually present behind the freezer (on the back left corner) or on the top. This is where you’ll find the reset button, so press down on it until the ice tray begins torquing.
B. Type 2 Models
These models have an ice bucket on the left or the top of the refrigerator, which you’ll need to pull out using the latch release on the right. This will bring the reset button into view; press and hold the rubber button for a few seconds to reset the ice maker.
C. Type 3 Models
Once again, start by locating the ice maker, following which you’ll find the reset button in front or below the refrigerator’s motor housing. You should keep pressing the reset button until the tray starts rotating and then wait to see the results.
It can take upto 24 hours for the cycle to complete, and you shouldn’t reset the fridge more than once a day.
Samsung Fixes:
- How To Remove A Samsung Freezer Drawer
- Fix The Fan Noise On A Samsung Refrigerator
- Samsung Freezer Not Freezing
- How To Fix Samsung Refrigerator That Is Not Cooling
- How To Add Apps To A Samsung Refrigerator
- Samsung Refrigerator Freezing Up
- Samsung Ice Maker Noise (How To Fix)
- How to Turn a Samsung Ice Maker On and Off
Conclusion

That’s all there is to know about removing the ice maker tray from a Samsung refrigerator; hopefully, you can do it yourself now.
As you have seen, it’s not difficult to remove the ice maker, provided you know what to do and are patient. Sometimes excess ice build-up over the tray requires you to melt the ice before safely removing the ice maker.
Moreover, it would be wise to read the user manual and get to grips with the different components in a Samsung fridge. Once you know all the buttons and their functions, it becomes convenient to begin a defrost or freeze cycle to keep the refrigerator in good shape while making maintenance easier.