Hitachi Refrigerator Error (Solution)
Hitachi is a well-known and trusted name in the electronic appliance industry.
The brand brings the best of both worlds – technology and style – to design refrigerators that prevent the loss of nutrients and make your space look sleek. So, you can trust their products to keep your daily consumables fresh and safe to eat.
However, like any other refrigerator, Hitachi refrigerators are subject to technical faults or errors, which, if not fixed any sooner, can break down the entire unit.
Thankfully, determining faults with these units is no rocket science as the integrated screen displays the error code for a specific problem. But then, again, you must know what each code signifies.
So, in this guide, we’ve gone over all the error codes and what they mean. Apart from that, we have some tips on how to fix those errors.
Without further ado, let’s get into the deets!
Hitachi Refrigerator Error Codes And Solution
1. F3 01
F3 01 error code denotes that the freezer door of your refrigerator isn’t properly closed. Check the alignment of the door hinges and ensure that the door seal is in perfect shape.
If the door seal is damaged or broken, it’s time to replace it with a new one. Thereafter, tighten the screws of the door hinges using a Philips screwdriver if they are misaligned.
2. F3 02
This code indicates that the door of your Hitachi refrigerator is stuck, causing hot air to replace the cool air inside.
Again, check if the seal is in good condition and isn’t leaking, torn, or weak. The paper test is one way to determine if a seal is defective. This test entails placing paper between the fridge and its door, closing it, and pulling the paper. If it comes out too easily, the seals are at fault, so replace them.
Apart from that, check the door alignment, and if the door hinges are out of place, fix them properly.
3. F1 01
F1 01 code indicates that there may be a problem with the heating element of the freezer. Check for its continuity using a multimeter if you know the nitty-gritty of working with it. And if it shows some fault with the device, consider replacing it.
4. F1 02
F1 02 indicates that the fan motor is not functioning properly or is broken, which could be due to a blown-out fuse, a shorted wire, or a bad bearing. You can check for the fault manually, or if you’re familiar with using a multimeter, that also works. If the fan motor is faulty, the only option is to replace it.
The fan motor is located at the rear side of your refrigerator or freezer compartment. So, move it away from the wall and unplug the fridge before touching anything. Start with removing all drawers and shelves to access the rear panel. Once everything is taken out, remove the freezer by unscrewing it.
There must be a wire connecting the fan motor to the freezer; pull that out and gently remove the fan from the shaft. Turn it around to access the motor and remove it. Then, insert the new motor and push the fan into the shaft.
Once the fan is secured, put all the components in their position and plug the refrigerator back.
5. F1 03
This code indicates that the thermostat or temperature control sensor of your refrigerator is defective.
To replace the thermostat, unplug the fridge from the power outlet and locate the thermostat using the instruction manual. In Hitachi refrigerators, these are generally located at the rear side of the unit, encased in a protective cover.
Remove the screws holding the cover, and keep it aside. Pull the wires connecting the thermostat and control board with the help of nose pliers, loosen the screw, and take out the thermostat.
Place the new unit properly in its place, and re-attach the connecting wires and the cover. Then re-plug the fridge and reset the temperature to check if the controls are working properly.
6. F1 04
If your refrigerator gives an F1 04 error message, your defrost sensor might be defective.
A defrost sensor measures the internal temperature of a refrigerator and determines whether it is too cold or too hot. And if the temperature is too high, it shuts off the defrost heater.
When the sensor is not working properly, the freezer will heat up and increase the temperature of the refrigerator, which in turn damages the evaporator. Use a multimeter to check for its continuity, and replace it if you find any errors.
Here are the steps you should follow to replace the faulty defrost sensor with a new one:
Step 1
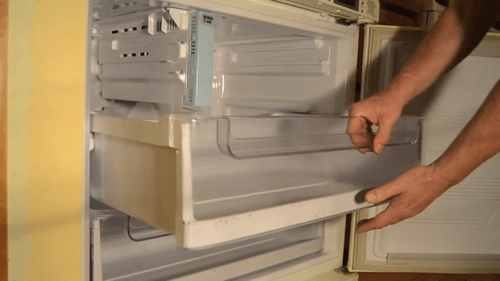
Unplug the appliance and shift it away from the wall to access the rear panel. First, remove the freezer door assembly by removing the screws and then gently pull the freezer racks.
Step 2
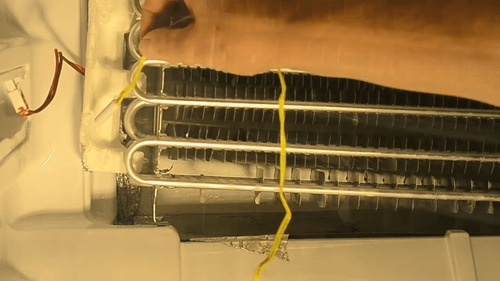
After removing the racks, remove the upper and lower rails and the rear freezer panel to access the defrost sensor located beside the evaporator coil. Cut the wires connecting the sensor, and remove them. Also, get rid of the thermistor from the top and the fuse from the bottom.
Step 3
Now it’s time to install the new defrost sensor, so insert the upper zip tie through the evaporator hole and secure it firmly by re-attaching the wires. Now put back all the freezer components carefully.
Once it’s done, re-plug the fridge and check if the sensor is operating normally. If not, you might have made some errors while installing the new unit, so call a professional technician to survey it thoroughly.
7. F0 07
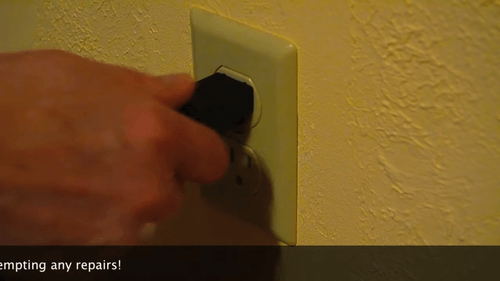
The following error code means a huge current inflow through your Hitachi refrigerator. So, you must unplug the unit to avoid any damage due to a power surge.
Also, use a multimeter to verify if all the components of your fridge are working properly. If you notice any errors in the readings, contact a professional technician to have them checked out, as working with them on your own can be both complicated and dangerous.
8. F0 08
Display of F0 08 error code means your fridge is running at an abnormally low speed. Technically speaking, the refrigeration cycle is not proceeding as it should be.
Several reasons might be behind this, like a faulty compressor, clogged water line, incorrect temperature setting, etc. So, it will be viable to call upon a professional to scrutinize and fix it properly.
9. F0 09
The aforementioned error code denotes a switch failure in your Hitachi refrigerator. There’s no way of fixing it, so replace it with a new one.
10. F0 12
If your refrigerator displays this code, it means the condenser fan isn’t rotating, and the motor has failed.
The fan is a vital component of a refrigerator as it regulates the operation of the condenser to convert the gaseous refrigerant into liquid form, thereby cooling your fridge. An inoperative fan means the temperature inside the cabinet will rise, overheating the compressor, leading to premature failure.
Among all the electrical systems in a refrigerator, the fan motor is probably the easiest to troubleshoot, and replacement is the only option. But make sure to check if there’s any damage to the electrical connection of the motor.
11. F0 03
Hitachi fridge ice maker problem? The following error code points denote a faulty automatic ice maker. In that case, perform its maintenance check to detect the particular problem and replace the entire assembly in case its performance has massively declined.
12. F0 04
Check for any major faults in your defrost circuits if your refrigerator displays an F0 04 error code. In such cases, a refrigerator takes several hours to complete the defrost cycle.
Although the problem with the defrost circuit might not seem that big, you must fix it as soon as possible. First, test all circuit components properly and if none works, consider replacing them with a new one.
Hitachi fridge service centre
Hitachi fridge service centers are dedicated facilities that provide repair and maintenance services for Hitachi refrigerators.
These centers are staffed by trained technicians who are knowledgeable in the specific design and functions of Hitachi refrigerators.
They can diagnose and repair any issues that may arise with the unit, including problems with the cooling system, door seals, compressor, or any other part of the refrigerator.
Additionally, they can perform regular maintenance tasks such as cleaning the condenser coils and adjusting the thermostat settings to ensure optimal performance.
Hitachi fridge service centers are typically authorized by the manufacturer and may have access to original parts, tools and technical information.
It’s recommended to check the warranty status of your fridge and contact the authorized service center for assistance.
Final Words
That’s all we have to say about error codes in Hitachi refrigerators and how to fix them!
Fixing some of these isn’t easy on your own. Hence, it’s crucial to call upon a qualified and experienced plumber to check the errors, determine the underlying reason and fix it completely. While the upfront cost may be high, a professional fix will help save money and time in the long run.
That said, several qualified and licensed agencies or individual technicians are available. But before hiring them, make sure they are qualified and experienced enough and have received positive reviews from the customers.
Alternatively, you can always contact Hitachi Customer care and schedule an appointment with them over a call or visit its website. They will be of great help as they understand the appliances better.
With that, we’ll wrap up this guide. Keep a tab over this space for more informative content. Goodbye and take care!