GE Refrigerator Ice Maker Water Line Frozen (How to Fix)
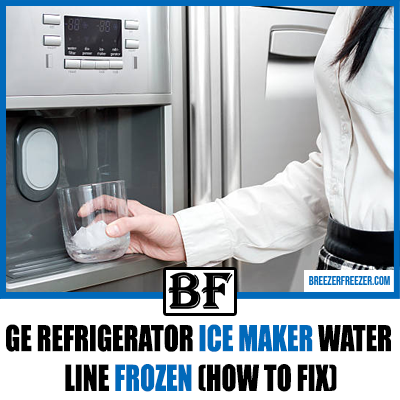
Spotted a malfunction in the ice-maker of your GE refrigerator just when you were about to make your favorite dessert? We know how disappointing that can be.
Here’s what you’ll need to do first — check whether the water line of the ice-maker is frozen, as that’s the most common issue affecting ice-makers during winter. And, if so, know that you may be able to fix it yourself — we’ll be explaining it all in this detailed guide, so read on to know more.
GE Refrigerator Ice Maker Water Line Frozen [How to Fix]
The Best Method To Fix A Frozen Water Line
You’ll need to take the following steps in case you find the waterline of the ice maker to be frozen. Note that this method requires using a hair dryer:
Step 1: Begin by taking out all the food items stored in the freezer. In case these include some perishable items, you’ll have to find a cooler that’s well-insulated and store them within the same. Make sure to utilize some ice packs to ensure the coldness is retained. Alternatively, you can use another freezer, provided you have one at home.
Step 2: Follow this by pushing the fridge away from the wall so that you get enough space to pull out its power cord. Also, this will provide you with an opportunity to turn off the inlet valve. This water valve generally lies on the rear end of the refrigerator.
Step 3: Now, examine the ice-maker within the freezer, and remove the ice bucket fixed beneath the device. You’ll find two screws or bolts holding it securely to the freezer surface — loosen them but be careful not to remove them.
Now, spot the two brackets that are used to mount the screws, and after you’ve loosened the screws, lift up the ice maker. This will help release the brackets from the bolts or screws since they’re fixed to the ice maker.
Step 4: Your next step will be to locate the wire harness connecting the ice maker wires to the back wall of the freezer. Then disconnect the harness from the wall by squeezing its sides so that the ice machine can be freed.
At this point, the machine is untangled, which will help you detach it from inside the freezer. Then lay a towel on a flat area and place the machine there.
Step 5: Now, you’ll find the frozen water line coming out of the rear end of the freezer. Grab the hair dryer and insert it into the nearest grounded power outlet. Follow this by turning on the dryer and adjusting the heat to a warmer setting.
You’ll then have to point the dryer to the water supply line and hold it firmly till you’re able to thaw and remove the ice jamming the line. But this will require extra caution, as the line uses plastic and might get warped easily due to the heat. On a side note, in case you use high heat on the waterline, it may cause the line to be destroyed.
That’s why it’s best to keep moving the dryer around to decrease the heating effect. Also, you can reduce and enhance the heat at times to retain the effect.
Step 6: Follow this by reconnecting the harness to the back wall of the freezer, just adjacent to the line. Then hang the ice maker brackets on the loosened bolts or screws, and tighten them to hold the ice machine in position.
Step 7: Finally, put the ice container or bucket back, turn the water inlet valve on, and insert the refrigerator cord into the power outlet. Let the freezer cool to some extent before refilling the space with the food items you had removed. But ensure its temperature settings aren’t higher than 5°F or lower than 0°F.
Notably, a temperature lower than this will freeze the line again, and a higher temperature will lead to cooling problems.
A Vital Precaution
While you’re using the hair dryer, make sure the freezer roof doesn’t have any ice. And, hold it at a level to ensure its back end doesn’t point upwards. In case ice or water droplets from the fridge roof fall when the dryer is upturned, it can lead to electrocution.
You should also note that most ice makers in GE refrigerators come with power cords connecting them to the appliance. Some even have on/off switches, so be sure to turn off the switch and disconnect the power supply prior to following the steps mentioned above.
Other Methods For Thawing A Frozen Water Line
If you wish to employ any other method, you can utilize a warm cloth for melting the ice in the frozen line. All you’ll need to do is soak a towel or cloth and apply it to the tube after squeezing it slightly. Make sure to continue this till the ice melts.
Once the ice has melted, it will result in the removal of the clogs within the water line. Note that this process will take longer to complete, but it’s completely safe.
Frozen Water Line In The Freezer Door – How To Fix It?
The GE freezer door also has a water line that might freeze sometimes, resulting in a similar issue as discussed above. To fix this, you’ll have to apply a water line buddy, which is a specialized instrument used to thaw a freezer line.
Here are the steps to follow for this method:
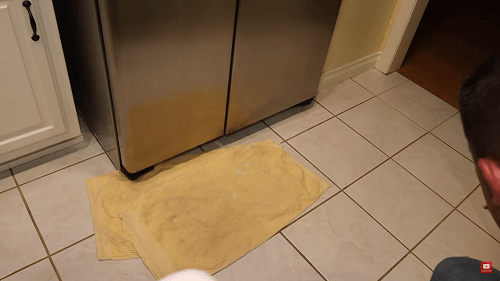
Step 1: Start by placing towels in the space at the front of the refrigerator and tucking another towel beneath the water dispenser. That way, the towels will catch the dripping water as the ice starts thawing.
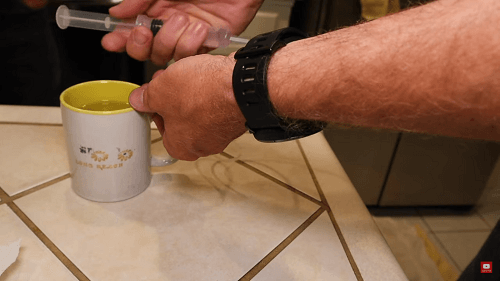
Step 2: Then fill the buddy tube with warm water; do this by taking some water in a small cup and filling the buddy tube from the cup.
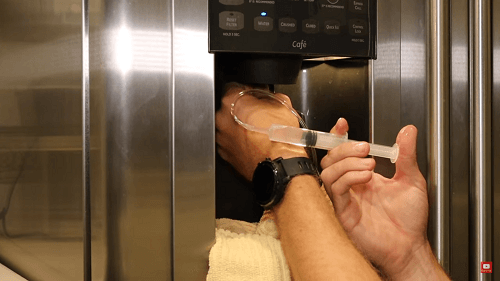
Step 3: The next step will be to insert the buddy hose into the line as far as it can go. Now, inject warm water into the water line till the buddy tube is empty. Continue with this process till the ice starts to melt and drips onto the towels spread on the floor.
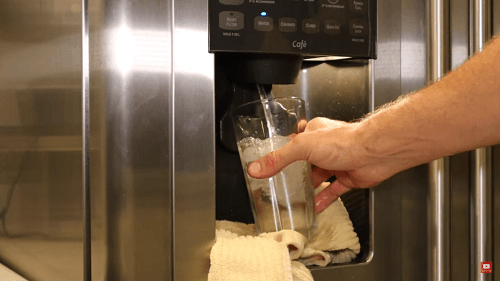
Step 4: Finally, check if the process worked by ascertaining whether the unit is dispensing water. If it does, you’ll know that the water line has thawed.
A point worth noting here is that you should check the door seal occasionally. In case the seal is slightly weak or there’s a gap, warm air will enter the fridge easily, and the moisture in the air will lead to quick freezing of this water line.
FAQs
How can you prevent the tube of the ice maker from freezing?
In case the ice-maker tube has been damaged due to an unusual situation like an extreme cold in the kitchen, this would also mean the water line is frozen and needs thawing.
Another case is when the fall in temperature occurs regularly. In such situations, the real fix would be to regulate the temperature of the room. But that might take longer to resolve; hence you should consider bringing in a space heater for the days when it’s too cold outside.
It’s possible to prevent the water line from freezing by simply turning it down. Most freezers come with a dial that lets users regulate the temperature. Just turn it to a lower level until you find a suitable setting to solve the issue.
Also, you can try finding a water line that comes with better insulation. Steel-braided water lines can help prevent freezing, which may be enough to stop the issue during lower temperatures.
Can plastic tubing be used for ice makers?
Yes, you can always use plastic tubing for ice makers, and it’s also the cheapest option available. The only drawback of going for such tubing is its insufficient insulation measures that might cause the water line to freeze, as discussed above. That said, if your home has efficient provisions for temperature regulation, plastic is the ideal material to opt for.
What is the size of tubing for ice-maker water lines?
Generally, the tubing size of the water lines for ice-makers is ¼ inch. Note that the tubing size is measured by the size of the couplings on both ends of the line, attaching it to the water pipe and ice-maker.
Final Words
There you have it — a simplified guide on the dos and don’ts of tackling a frozen water line in a GE ice-maker. Following each step carefully will ensure the device is back in order soon. So, it won’t be long before you can get ice cubes for the desserts you’ve been missing for a while.
Here’s the last tip before we sign off: if the water line freezes multiple times, know that the source is a more critical problem. Thus, you’ll need to contact a reliable fridge repair to fix it or get the unit serviced by GE Cares, the brand’s customer support.
See you next time!